

How To Install A Ceiling Fan Without Existing Wiring
When we moved into our new business firm a few weeks agone, one of the very first things we wanted to change was the lighting state of affairs in the bedrooms. All the bedrooms had no overhead lighting. Instead, they all had an outlet on a switch and then you lot could plug a lamp in.
We really wanted overhead lighting then that nosotros could do a fan and light combo to keep the rooms cooler in the summer.
Subsequently doing a lot of research and consulting with an electrician, we learned we could install the fan box and run the wire to the calorie-free switch ourselves. (It was really pretty easy and only took us a 24-hour interval to do this in all iv bedrooms).
After nosotros did that, nosotros would only need an electrician at the terminate to wire the light switch and take the outlet off the light switch. Thus, saving us a lot of money on the project by dramatically reducing the corporeality of labor we were paying for.
In this guide, you will learn how to install a ceiling light (and fan) and get the wires from the light to your light switch. After that, call your electrician to wire the light switch, savor the money savings and the room's new ambiance.
Overview of the Process:
The whole process tin can exist broken downwards into 5 parts:
- Install a braced fan box (You)
- Run a wire from the fan box to the switch (You)
- Install the ceiling fan/light fixture (Yous or an Electrician)
- Wire the switch (Electrician)
- Take the outlet off the switch (Electrician)
Now, you could hire an electrician to exercise all these steps but that will be very pricey. Yet, doing the steps I recommend (and are covered in this post) volition dramatically reduce your costs by slashing the corporeality of labor you're paying for.
The steps that I recommend an electrician exercise such as wiring the electrical switch will non be covered in this mail service. Those tasks (the switch particularly) should exist left to a licensed electrician as improper wiring could result in injury, decease, or burn. If y'all decide to accept those on, in that location are a lot of YouTube videos that do cover those subjects.
Tools and equipment
In social club to do this projection, you lot will need the post-obit supplies:
- Tape Measure: You will employ this to measure the heart of your room to know where to put the ceiling fan/calorie-free.
- Sheetrock saw: Once y'all find the center of the room, y'all will use a sheetrock saw to cut a pigsty. You will also need this afterward on in the projection to cut a hole above the light switch on the wall.
- Braced Fan Box(es): The fan box is what you put in the ceiling to attach your fan/light fixture to the ceiling. Y'all volition need one for each room.
- Power Drill: You will demand this to drill holes (normal drill bit and long drill bit) so you tin can feed a wire the ceiling and to screw the fan box in the ceiling.
- Ladder: This will help you measure the ceiling to find the middle simply as well to access the cranium.
- Wire Glaze hanger: Or something like. You lot will use this to find the center of the room in the attic.
- N95 mask: You will use this when you lot get into the attic and it will protect you from insulation, specially if you accept diddled fiberglass insulation.
- Protective clothing: Wear gloves, long pants, long socks, long-sleeve shirt when in the attic and so that you lot tin protect your peel from the insulation, which can make you itch similar crazy.
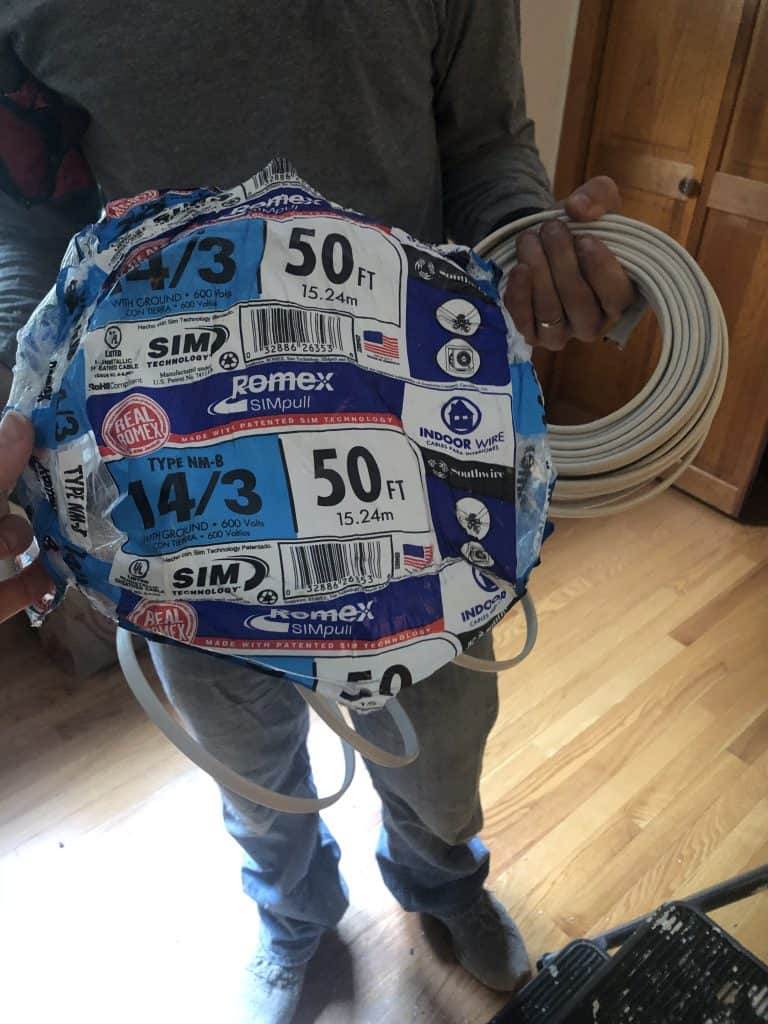
- fourteen/3 Romex wiring: This is the cord that y'all volition feed through the fan box and and so all the way to the calorie-free switch. I bought two 50 pes spools to do four bedrooms.
- Ceiling Fan/calorie-free Fixture: Pick out 1 for each room depending on your way. Here is the fan nosotros used.
- Dimmable Fan/Light Switch: Assuming you lot're doing a ceiling fan, you'll want a switch that'll fit in a single outlet that can dim both the fan and the light. Hither is the one we used.
- Drywall Compound and Putty knife: Yous will use this to patch the pigsty to a higher place the light switch.
- Sheetrock Patch, Drywall Joint Tape: To set up the area to a higher place the lite switch.
- Sanding Sponge: Medium Grit (~120). After the putty dries, you will sand it smooth earlier painting.
- Wall paint color: The final step to repairing the wall is to re-paint it.
Overall, this project costed united states of america roughly $800 to do iv bedrooms since we already had a power drill, tape measure, ladder, and sheetrock saw. Our ceiling fan/light fixtures made upwards the bulk of the toll since they were $150 each. Outside of the ceiling fan/calorie-free fixtures we bought, doing this tutorial in 4 bedrooms would cost $200 full.
My husband is very skilled at doing electrical then we saved fifty-fifty more past not hiring an electrician (although I'd advise against that for most people).
The project can exist easily done in a day. We did all iv bedrooms in a day.
Next, I will intermission upwards the tutorial in parts with each pace described in swell detail.
Part 1: Install the Fan Box
The offset stride in this tutorial is to install a fan box in the ceiling at the center of each room. For this office, you will need the following supplies:
- Tape measure
- Sheetrock saw
- Braced fan box
- Ability drill
- Extra long drill bit (ane/2" thick)
- Ladder
- Wire coat hanger
- N95 Mask
- Protective Habiliment
Stride one: Mensurate the verbal heart of the room
Accept your record measure and mensurate the room'southward width and length. Once y'all have these measurements, divide each in one-half.
Making these measurements along the ceiling is difficult, so showtime out past measuring on the ground your one-half distance. Then you'll go from in that location along the ceiling to measure your second altitude. Make a tiny mark on the ceiling (in pencil) where your center is. Then measure your first distance along the ceiling to confirm you have the right spot.
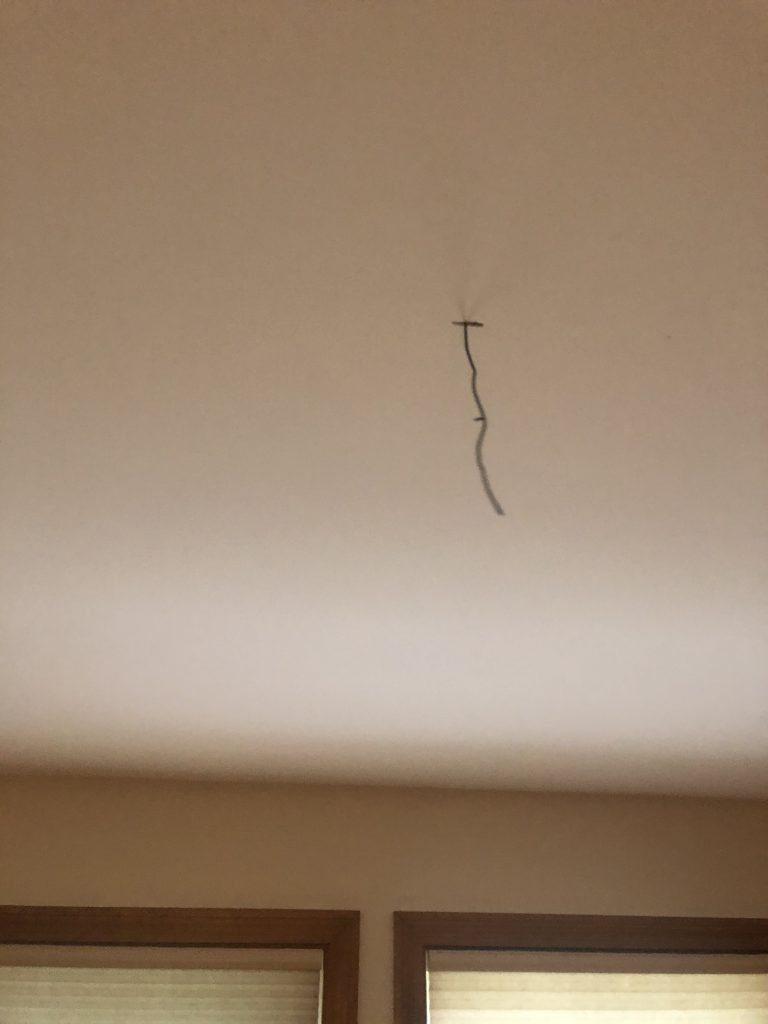
Footstep 2: Drill a pigsty and poke a wire through
At the center of the room, drill a hole in the ceiling.
Now, use a wire coat hanger (or something similar) and feed it through. You volition use this to locate the same spot when y'all go into the attic.
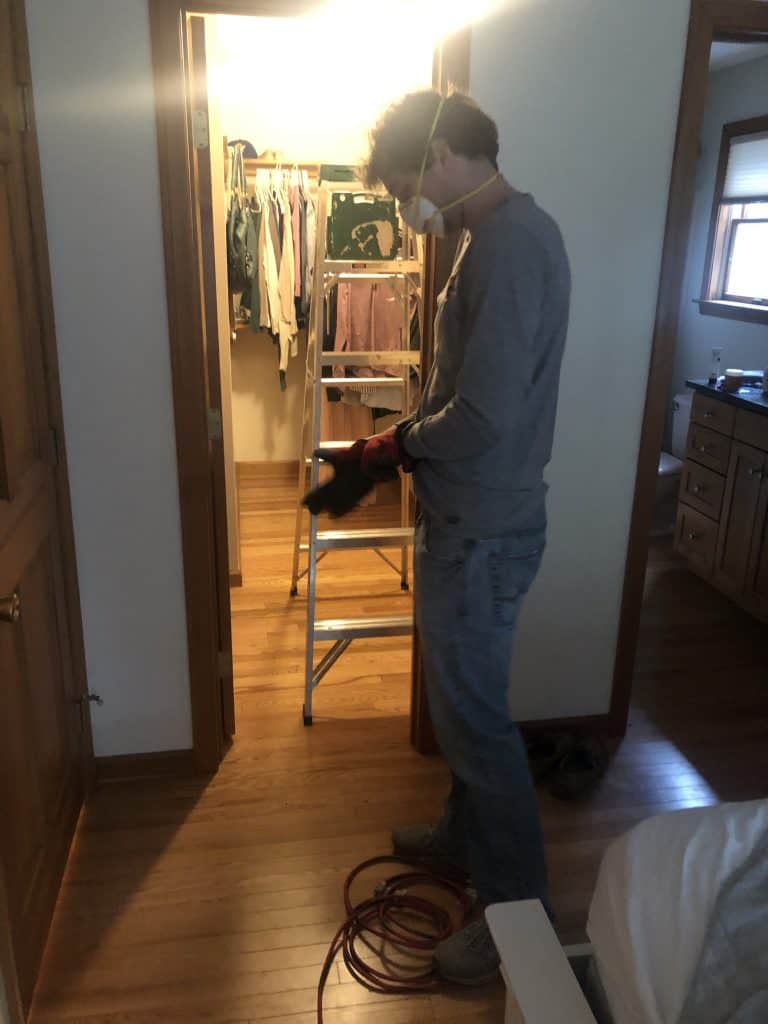
Step 3: Get on protective gear for the attic
Next, you demand to notice the spot via the coat hanger in the attic. Get-go by gearing upward with putting on protective habiliment (gloves, long socks, pants, long-sleeved shirt) and lastly an N95 mask. This will protect you from fiberglass insulation.
Once y'all have all your gear on, grab a ladder and use information technology to become into your attic access.
Stride iv: Locate the wire in the attic and articulate insulation off the spot
Once you are in the cranium, you should be able to see the wire sticking out. It might assist if you tin have someone jerk the wire from the room.
Once you locate the wire, you lot want to move the insulation off of that spot. You lot can but use your gloved hand and button it aside.
You will exist cutting a small hole in the ceiling for the fan box and you don't want the insulation falling out and into the room. One time you are washed with the project, you tin move the insulation back over the spot.
Yous tin run across all of the fiberglass insulation floating in the air in the GIF below, which shows why it actually is so of import yous wear that N95 mask.

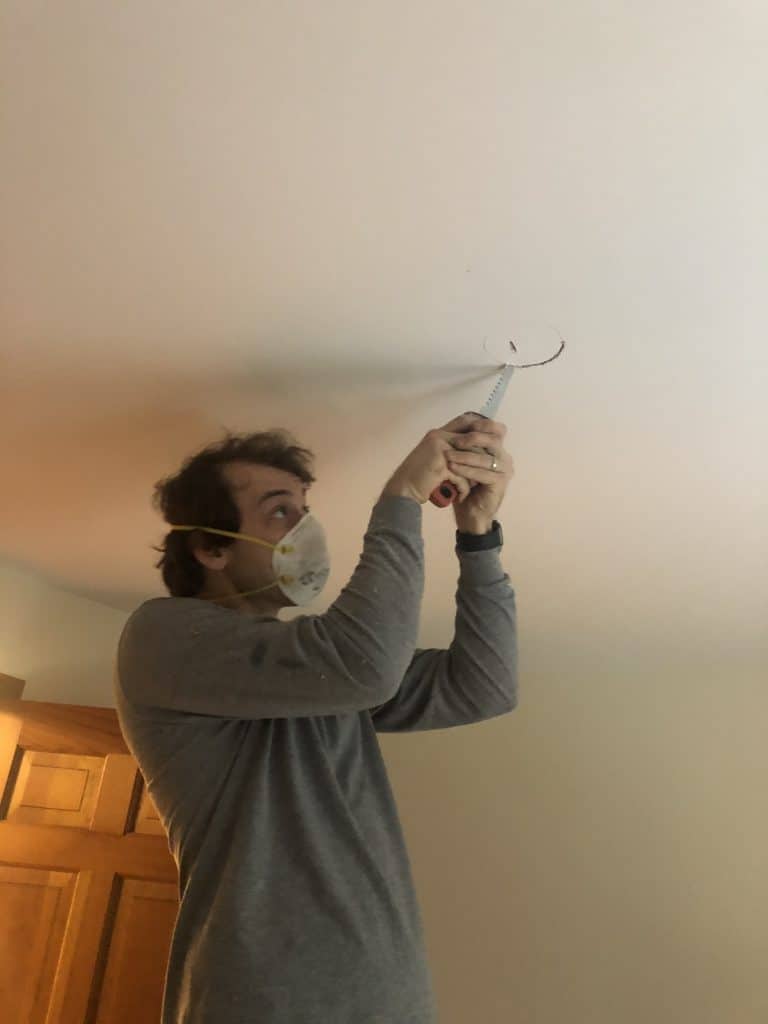
Pace v: Outline and cut a hole for the fan box
Afterwards you lot clear the insulation away, come up out of the attic and find your braced fan box. Place the heart of the box at the centre of the room (where you drilled the pigsty).
Trace the outline of the box (which is actually a circle) with a pencil.
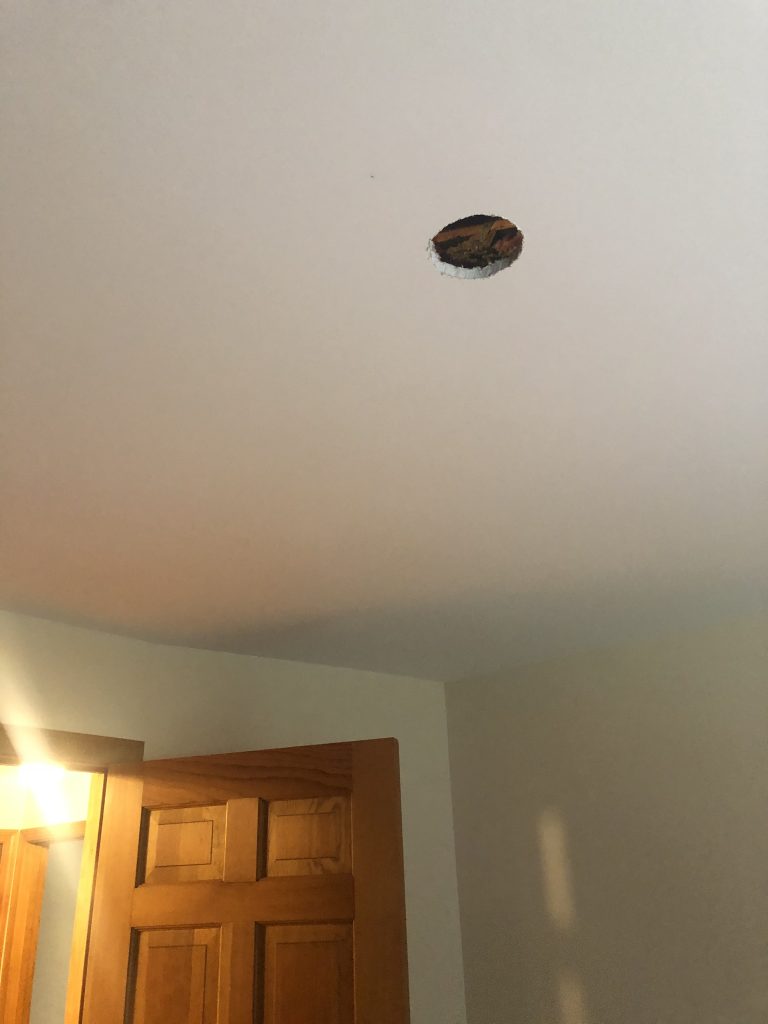
Now, take a sheetrock saw and cutting the pigsty in the ceiling using the circumvolve you traced every bit your guide. As you tin run into in the flick, it is a good thought to wear your N95 mask incase insulation falls out.
Hither is a picture of what your ceiling should look like after you complete this step.
Step 6: Prep and install the fan box
In this step, yous will get support into the attic and spiral the fan box in place with your power drill.
However, before you do that, take a moment to prep the fan box.
After nosotros installed the beginning one, we realized that it was easier if you flipped the bar around so that the holes for screwing are exposed from the elevation rather than the bottom.
The picture below shows the default setup, since they are usually installed from the bottom when edifice a new house before sheetrock is washed.
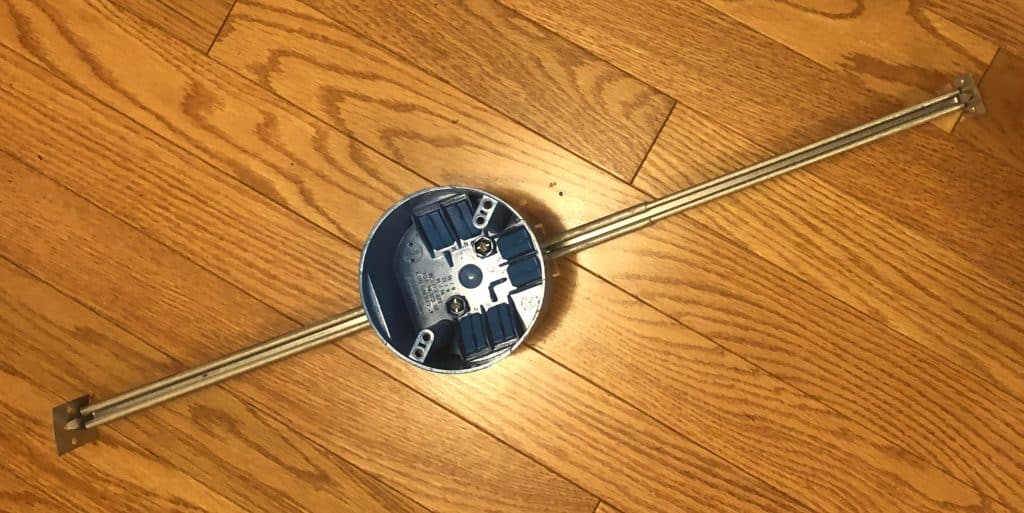
And so, what you lot want to practice is just
- loosen the two screws in the box
- rotate the bar 180 degrees
- re-tighten the screws.
This will save a lot of frustration when you're upwards in the hot insulated attic.
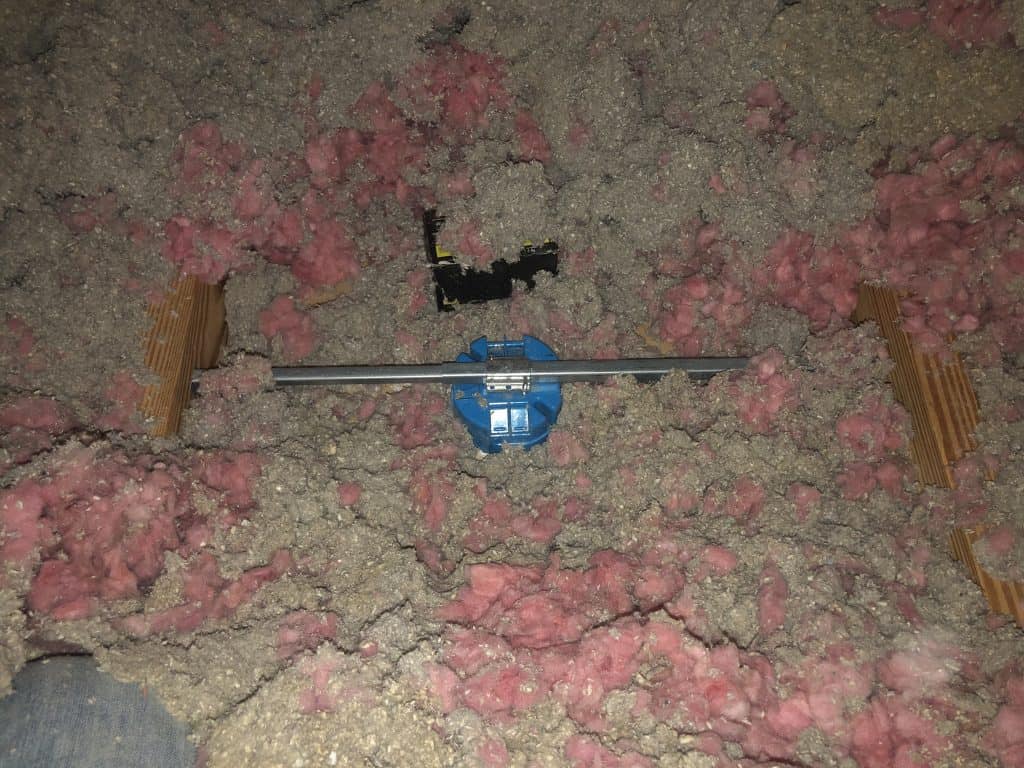
Now you lot are ready to install the fan box. Bring the fan box and a power drill into the cranium and install the braced fan box in the cut hole.
To practise this, arrange the bar length until it volition reach the ii side beams. Before yous screw it in place, make sure you take a person property the box flush against the ceiling. You could agree a board or a volume against the bottom to continue it affluent.
Once it'south installed information technology should expect like the picture below. You lot are done here, y'all can put the insulation back in place.
Part two: Run the wire from fan box to electric switch
Now that you lot take your braced fan box in place, information technology is time to accept the 14/3 Romex wire and run it from the fan box to the light switch. The supplies you need for this footstep are:
- xiv/three Romex Wiring
- Sheetrock saw
- Power drill
- Extra long drill bit (i/2" thick)
- Ladder
- Wire coat hanger
- N95 Mask
- Protective Clothing
IMPORTANT Footstep: TURN OFF THE BREAKER! While you won't be wiring the lite switch, you will open it, and then be sure y'all plow off the breaker for the room.
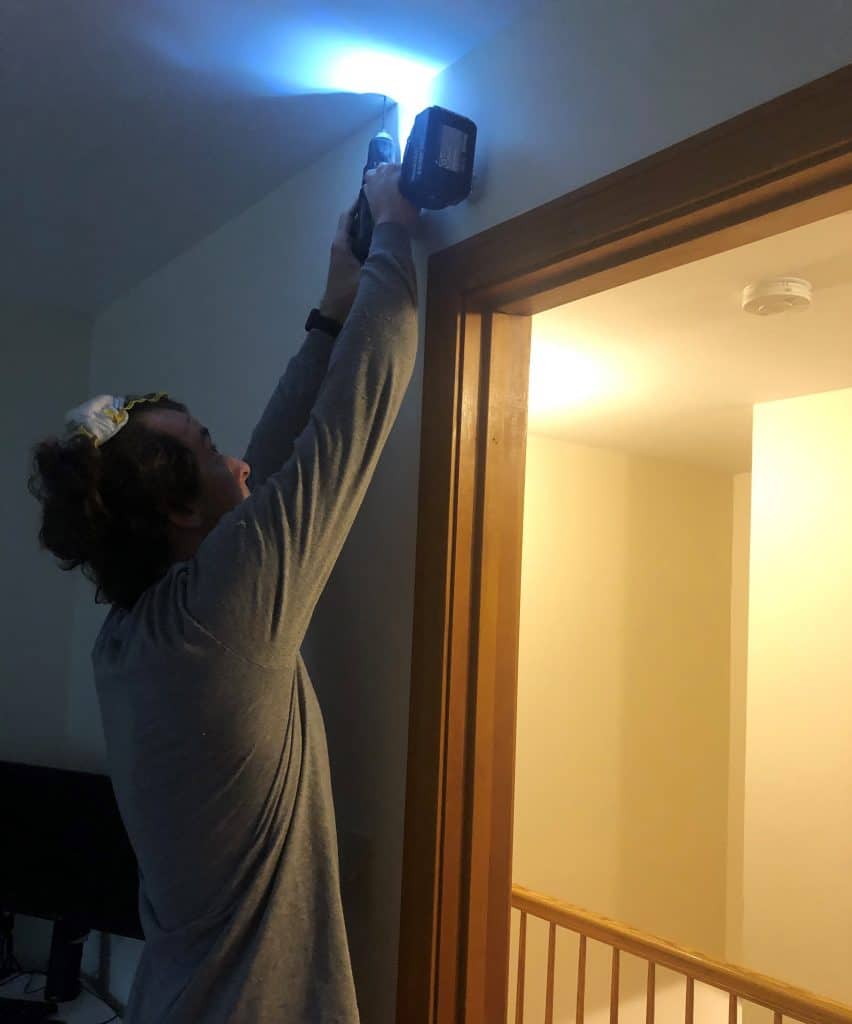
Step 1: Drill a minor hole directly above your light switch and feed a coat hanger through
The first matter you want to exercise is use your drill and brand a modest hole in the ceiling straight to a higher place the light switch.
Once you make the hole, you will be doing a similar process as before. Using a wire, feed it through the hole every bit a marker to find the same spot when in the attic.
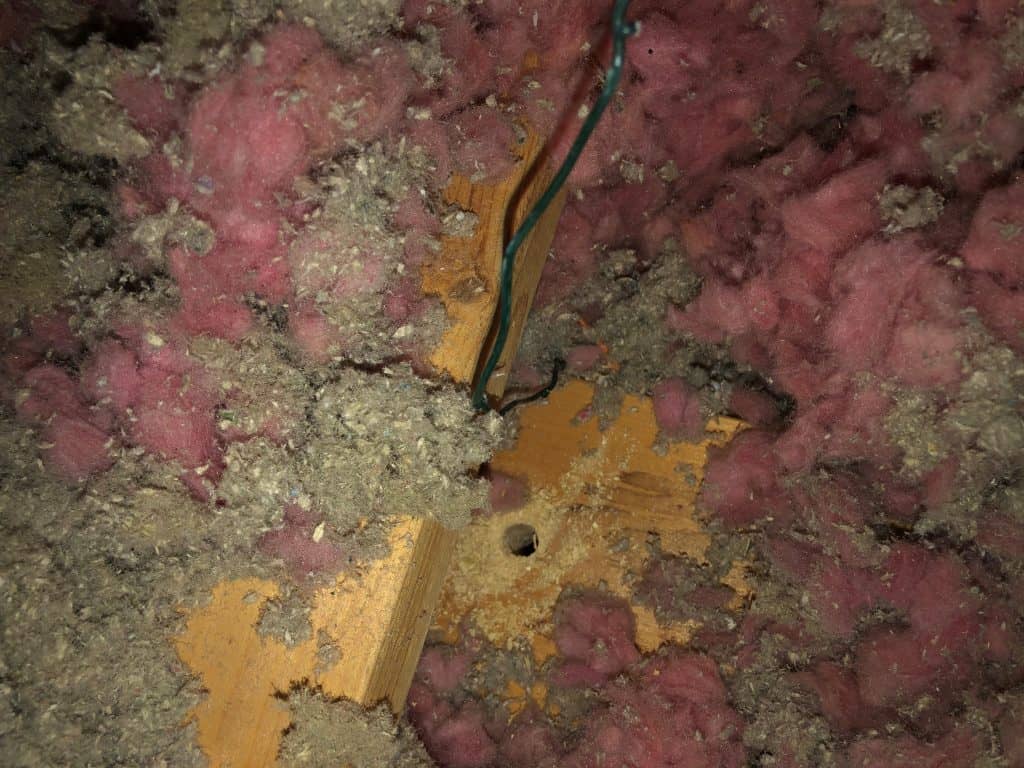
Step 2: Locate the wire in the cranium and drill down through the stud
Once yous observe the wire in the attic, clean away the insulation. In one case you lot exercise this, you'll exist able to locate the stud that you'll have to drill down through to feed your wire through the wall to the switch.
Pace 3: Open the light switch
First check there is no power going to your light switch. You do this by trying to turn the light on. If the lamp (or any is connected to your switched outlet) does not plough on, then you are adept to go.
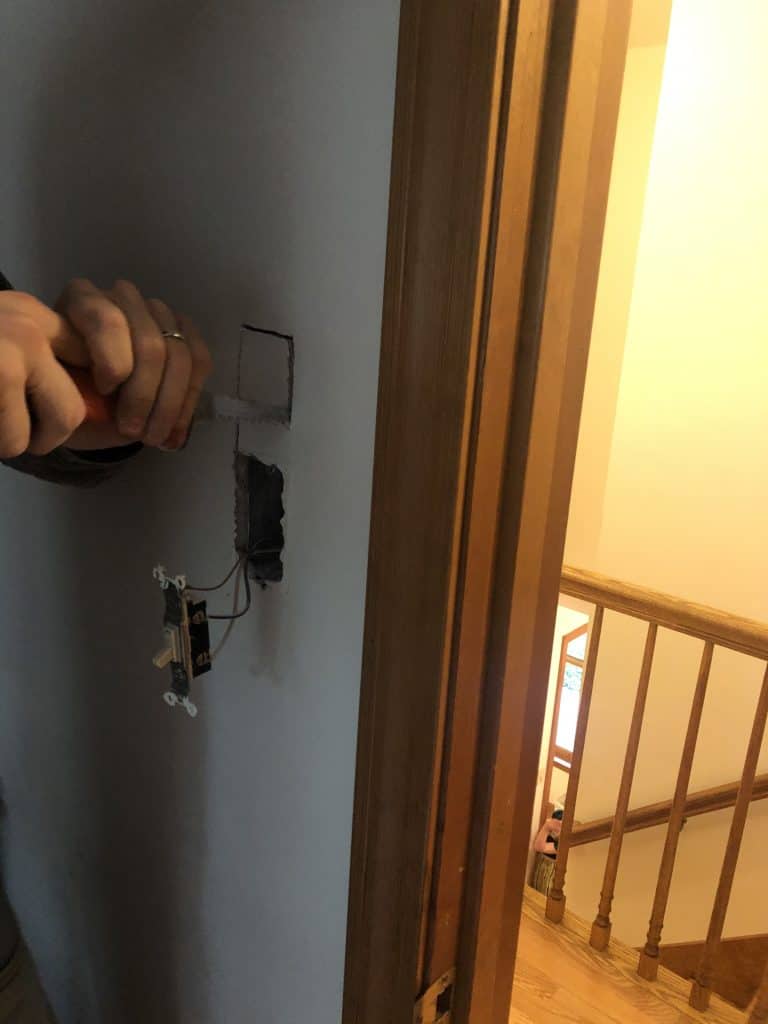
One time you check the power is off, open the low-cal switch by taking the plate off and pull the switch forward. The purpose of doing this is to go the switch out of the way in the following steps. You tin see what I mean in the picture in the next footstep.
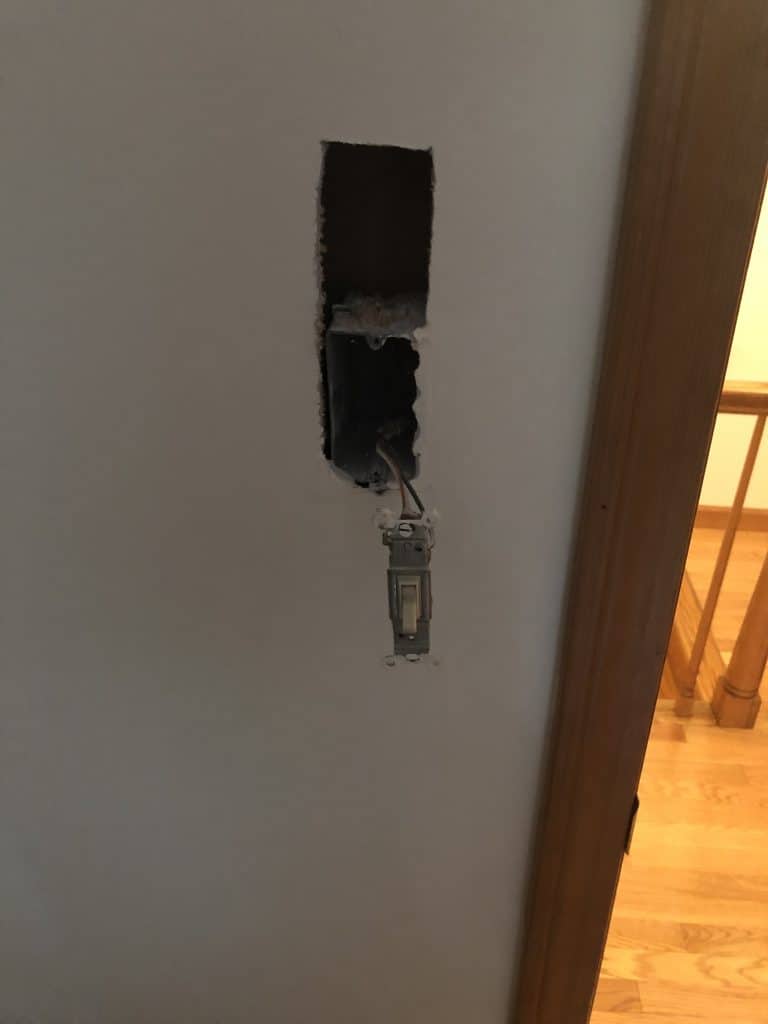
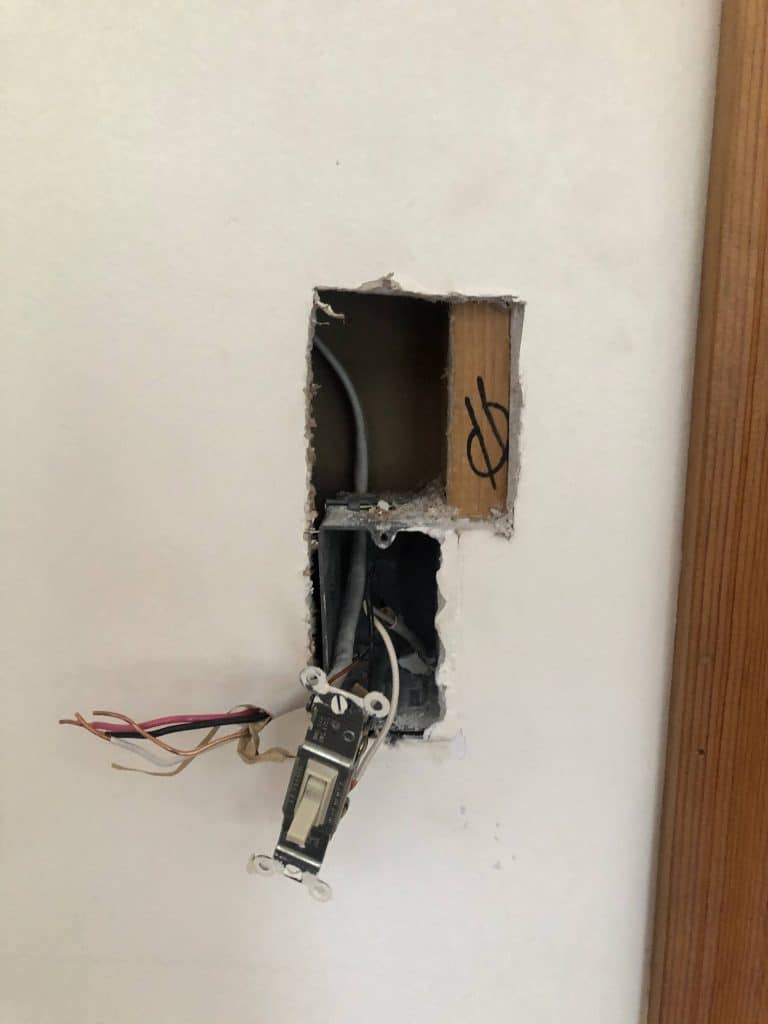
Step iv: Cut a small square in the wall above your outlet
When you feed the wire from the fan box through the cranium to your lite switch, you will need to be able to grab it and feed it through the electrical box.
By cutting a minor hole directly in a higher place the low-cal switch box, you lot will exist able to reach into the wall and take hold of the wire in afterward steps. Don't worry, at the end of this post, I will tell you how to patch the wall.
Step 5: Feed your wire through the fan box into the attic
Now you'll desire to feed the 14/iii wire through the fan box.
It's all-time if you have one person in the room feeding wire, and another person in the attic helping to pull it. In that location are little openings in the fan box and in the switch box that can exist opened using a flathead screwdriver or needle-nosed pliers.

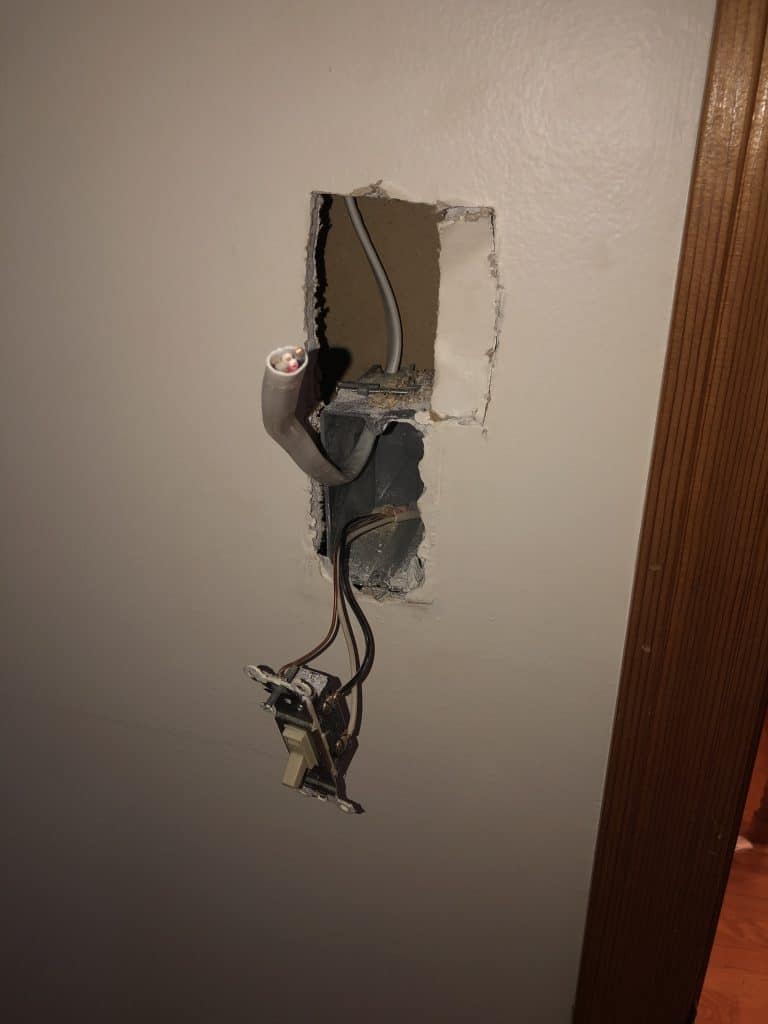
Stride 6: From the attic, grab the wire and then feed information technology down the wall
Now, grab that wire in the attic and feed it through the hole and downwards the wall. This stride is much easier with two people. While one person feeds the wire down the wall, the other person can look for it in the hole above the light switch.

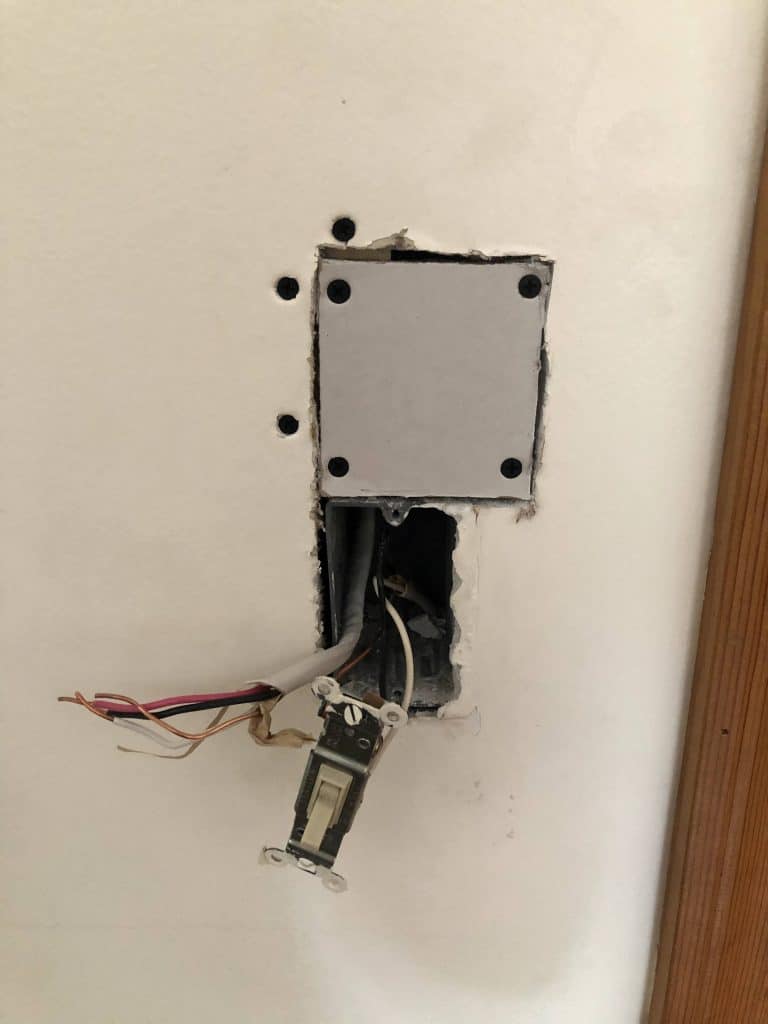
Step vii: Open a new tab on your switch box and feed the wire through
Once, y'all detect the wire in the wall, you want to pull it through a tab on your switch box.
If you have no open up tabs or your switch box is full, only go out the wire outside the box and leave it for your electrician.
Once y'all stop this step, you're gear up for your electrician!
Function 3: Buy and install your lite fixture
Now that y'all accept installed the fan box and fed the wire through, y'all tin can go ahead and install the ceiling fan/light. For this office, yous want to follow the instructions that come with the light fixture. You can too go out this office for the electrician but normally the directions are detailed and easy to follow.
The fan/light fixture we bought for our rooms was the Arleigh 44in. LED White Ceiling Fan I liked them because the reviews said
- Easy to install
- Very placidity fan
I besides liked them because they were white, and I have read from home decor sites that it is best for them to alloy into the ceiling instead of sticking out (and being an eye sore).
Here is a picture of our beautiful new ceiling fan and light!

Part 4: Repair the wall
You do non want to repair the wall until you've had the electrician come and wire the lite switch. One time that is finished, yous are good to go on putting the wall back together. For that yous will need:
- Sheetrock Putty
- Putty pocketknife
- Mesh Drywall Articulation Tape
- Scrap woods or 1"x4" pine board
- Sheetrock screws
- Sheetrock patch that matches your existing wall thickness
Step ane: Cut dorsum the sheetrock to expose the stud.
This volition give yous a space to boom the sheetrock patch.
Step 2: Cut a piece of scrap board to install
Yous'll want a board that'south at to the lowest degree 3-iv inches wide so you take enough infinite to attach the existing sheetrock and plenty space to attach the sheetrock patch. Make this piece a few inches longer than the opening and then you have room to screw in the patch. Y'all could use a flake piece of plywood, or maybe fifty-fifty a fleck 2×4. The best option would be a i×iv, merely apply whatsoever yous take lying around that will fit.
Step 3: Slip the lath behind the wall and attach the existing sheetrock with sheetrock screws

Step 4: Measure out the new opening and cut your sheetrock patch
Information technology's okay to not take the measurement and fit be verbal, the joint chemical compound will cover the cracks. It'southward better to accept your patch be too pocket-size than likewise large.
Step 5: Screw in the patch to the stud and the board you lot added
Step vii: Tape the seams and utilise joint chemical compound.
Using mesh drywall joint tape, yous want to comprehend all of the gaps or seams (not pictured). This will prevent the drywall from swell down the route.
It volition probably take a few layers to go it looking correct. Employ a layer, let it dry out completely, then apply another layer. Keep doing this until y'all've completed covered the drywall record and matched the aeroplane of the existing wall. As yous tin see in my picture, your get-go layer won't exist pretty, but don't worry, it'll look adept in the stop.
While you have the joint chemical compound out, you can also apply it to cover the hole in your ceiling you drilled direct above the light switch.


Pace eight: Sand
In one case completely dry, sand the sheetrock with 120 grit sand paper or sand sponge. Run your hand along information technology and sand until completely shine. Sand the hole in the ceiling too.

Footstep 9: Paint!
Now you want to paint the patch the colour of the room before putting the plate back on. Pigment the small-scale spot on the ceiling every bit well.

At present you're project is consummate and you can enjoy your new ceiling fan and low-cal!
We are also half fashion through painting our oak trim white in this photo (see the window frames).
Installing Ceiling Fans and Lights
By doing a lot of the labor of installing your ain ceiling fan/light fixture yourself, y'all can relieve a lot of money. We were able to install braced box fans in all 4 upstairs bedrooms and run a wire from the box to the low-cal switch in a day. Next, nosotros installed the ceiling fan/calorie-free fixtures into each room following the directions that came with the fixture.
After that, an electrician tin wire the switch. Lastly, nosotros patched the wall and the ceiling hole with articulation chemical compound. Once it was sanded and dried, we repainted those sections.
Overall, the project was well worth it for the corporeality of money it saved and the overall improvement ceiling fans and lights made to the upstairs bedrooms. It is admittedly amazing how much it can transform the space. I feel like I never truly appreciated light fixtures as much as I exercise now.
If you plant this guide on how to install overhead lighting in a bedroom helpful, then please share on Facebook or Pinterest.


I am a wife, teacher, and mother to two awesome girls. I write about what I am passionate, which is sharing my experiences, failures, and successes on everything from family, marriage and maternity to home improvement, DIY firm projects and habitation making. I as well ever enjoy sharing with my readers tips I learn well-nigh selfcare, beauty and skin intendance for women. Let this infinite exist a resource for you to pursue your very best day.
Source: https://pursuetoday.com/how-to-install-a-ceiling-fan-and-light-in-a-room-with-no-existing-lighting/
0 Response to "How To Install A Ceiling Fan Without Existing Wiring"
Post a Comment